Jacqueline Binkley
photography for joyful people


DIY Brush stroke or brush stamp accent wall tutorial
I need a creative outlet every week whether that be through photography or a home project. Even though this week I had plenty of photography sessions to keep me occupied, I was still itching to add more bold color to our farmhouse!
This spring with COVID successfully shutting down photography sessions and the stay at home order in effect I was inside the house more than usual and of course when I had a free moment I’d scroll through Pinterest. I started noticing that while there were things in our home that I wasn’t overly pleased with, I would have the thought “well I’ll do this different if we add on or move to a new house.” I finally stopped myself and asked, “Why am I waiting for the future? If I’m not happy now, make a change! Life is too short to have wishful thoughts. Take what you have and turn it into something you love!”
So that started the hunt to turn my kitchen/dining area into a room I loved!
Having completed that project I was determined to add more bold colors and texture to the walls with the leftover paint.
Which leads me into my brush stroke (more like brush stamp) accent wall tutorial!
Time: about 1 hour to paint and 2+ hours to dry
Supplies: Paint, brush of your choice, scissors
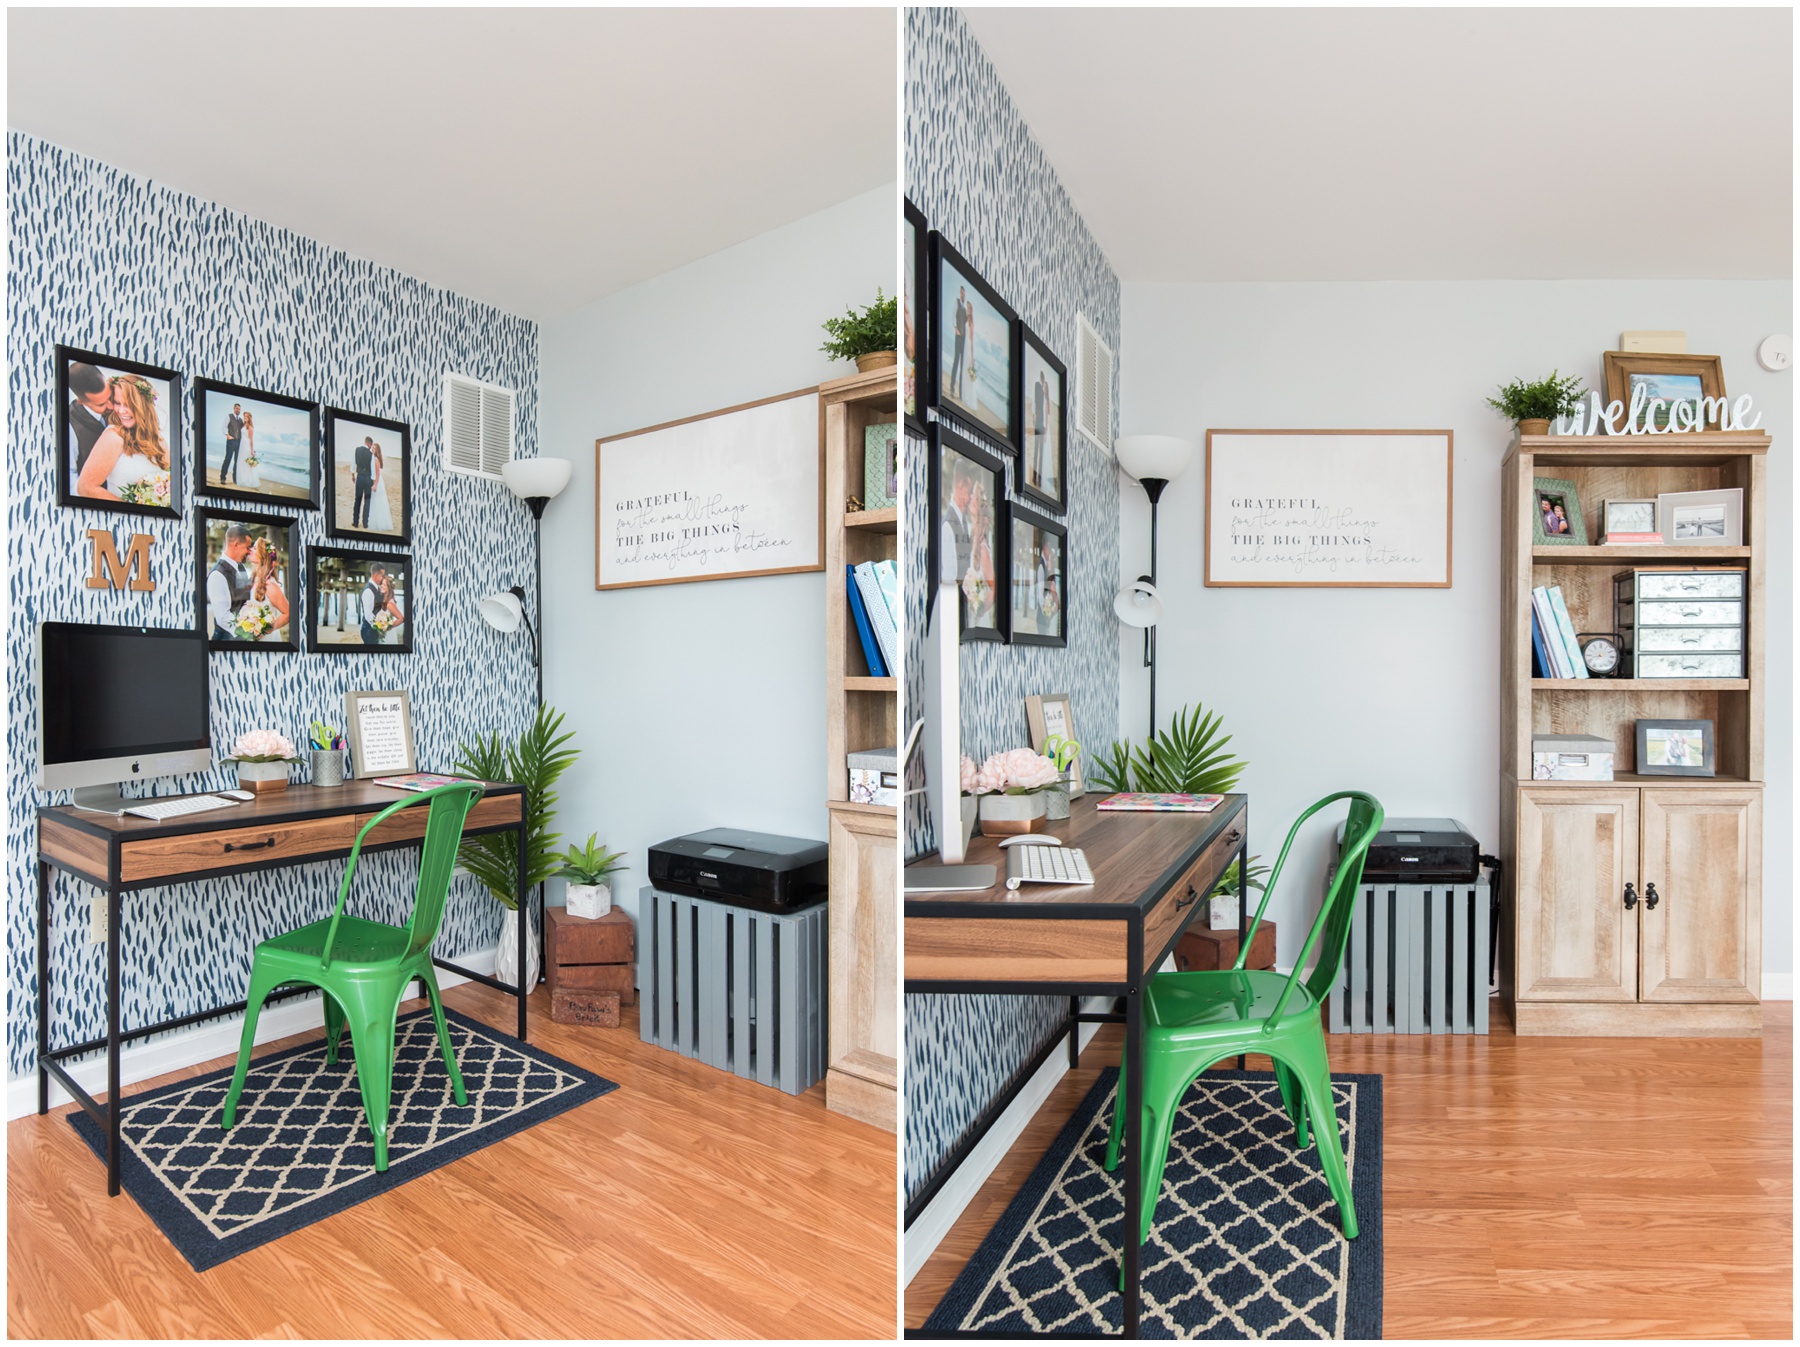
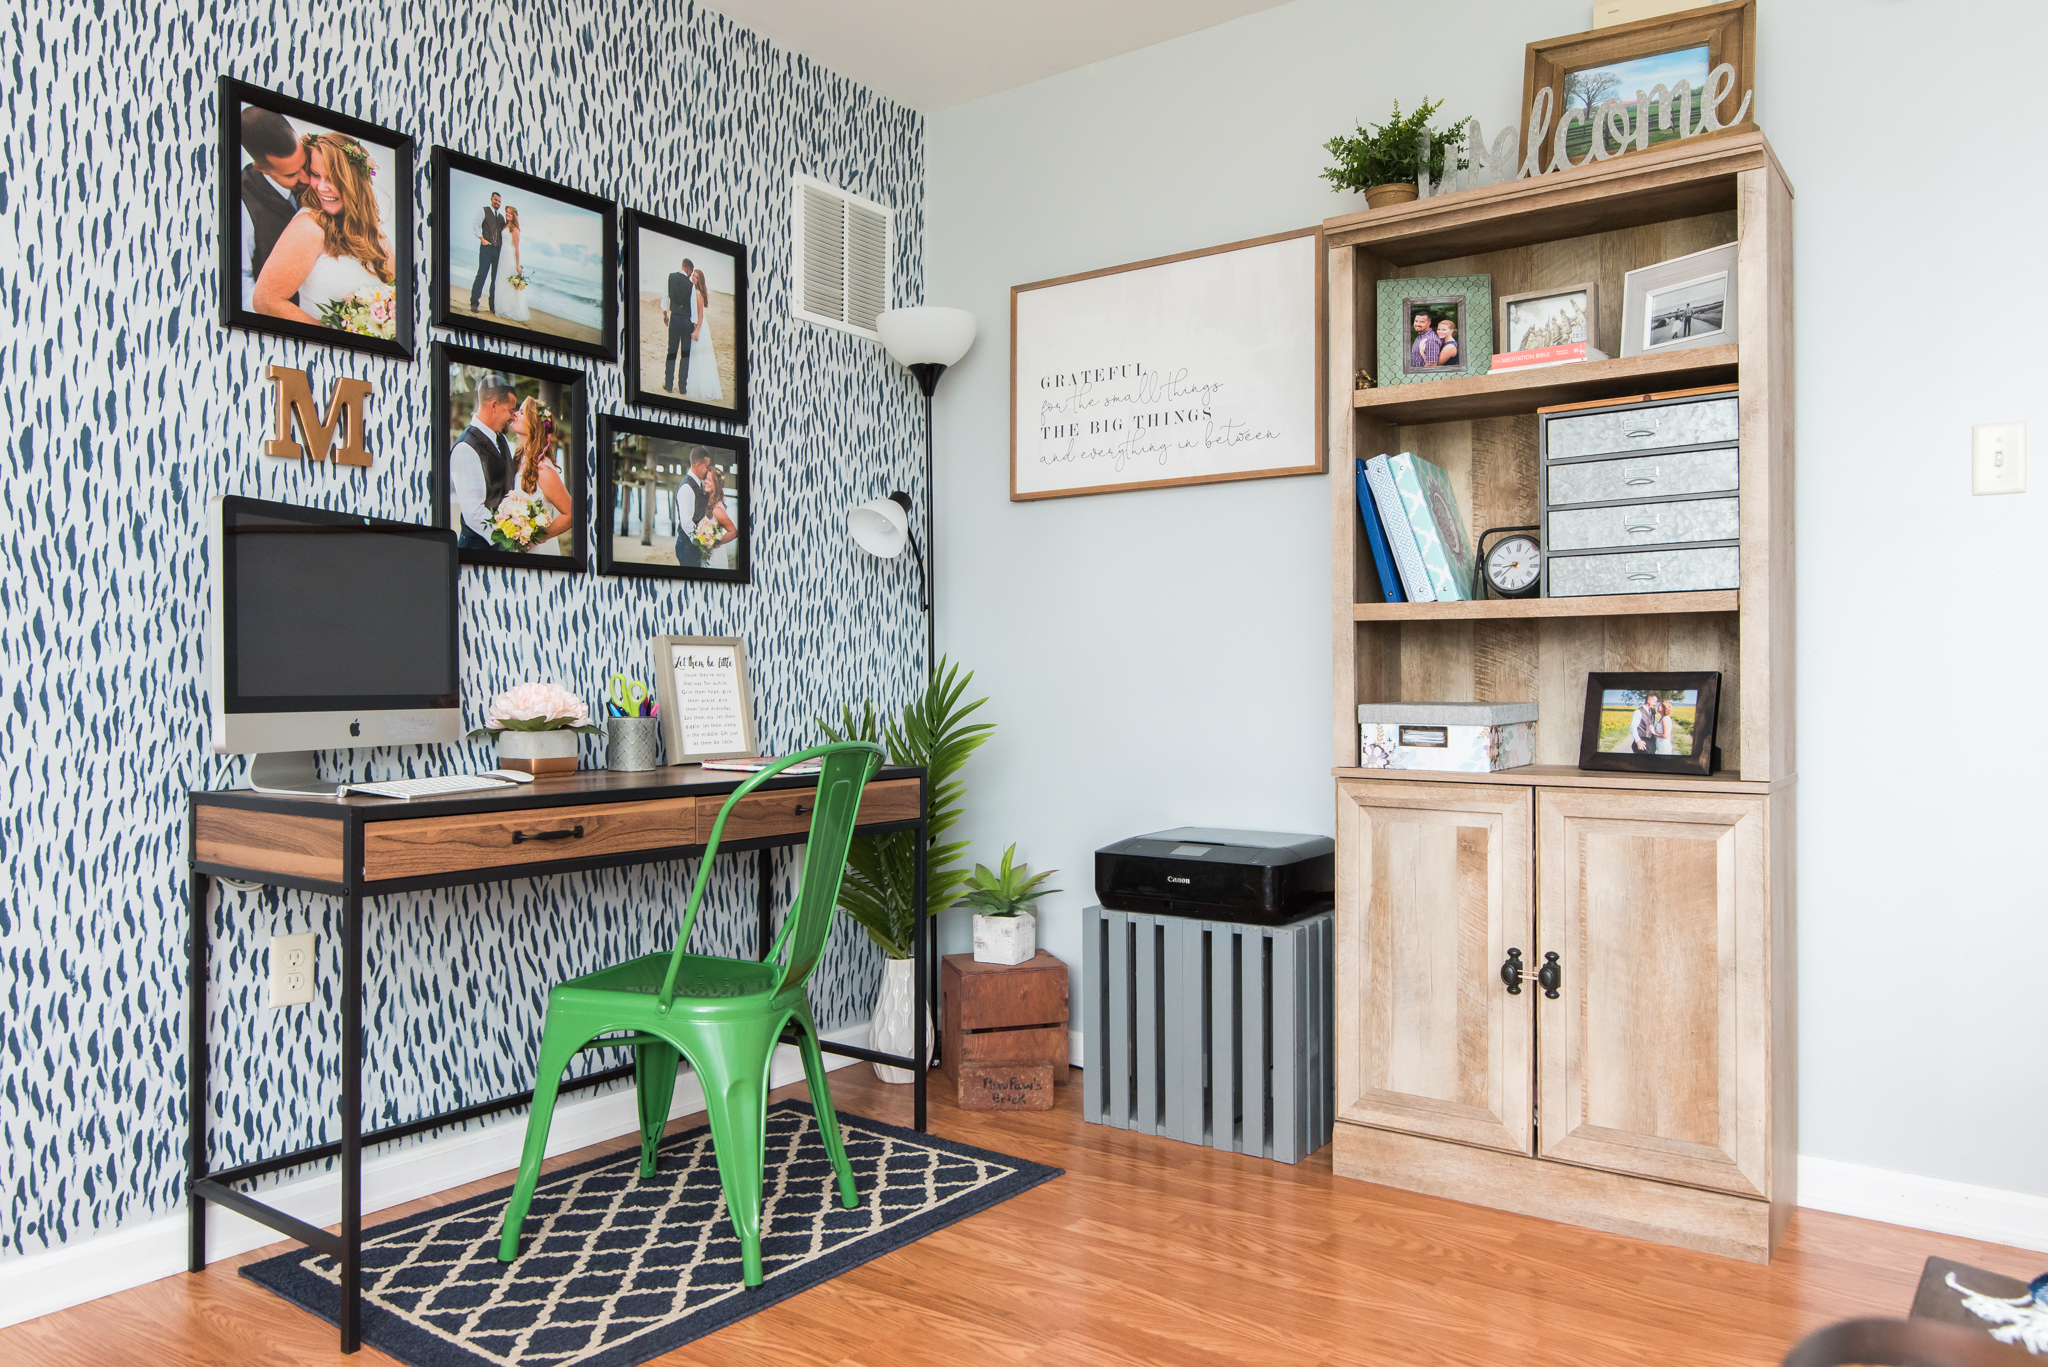
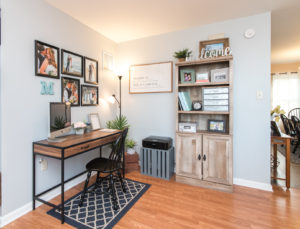 Here is the area before I started. I’ll be adding the pattern to the wall behind the desk.
It’s not bad.
Just a little plain.
The wall color is Behr Planetary Silver and I love it for our living room and hallway. It’s a blueish grey color and goes well with our navy, grey, and flour-white color scheme accented with green leaves in our farmhouse.
 To prep I took down the images from the wall and took off the outlet cover. You’ll see I didn’t tape or even take down the wall vent or command strips. I don’t like to make projects more complicated than they need to be, the wall outlet was only one short screw and I was fine just making the pattern around the other objects. Also, I hate taking those command strips down! The frames were going to go right back up how they were so the thought of spending time trying to space them out again wasn’t a fun one. Plus, I adore these images from our honeymoon so I won’t be taking them down anytime soon. 😉
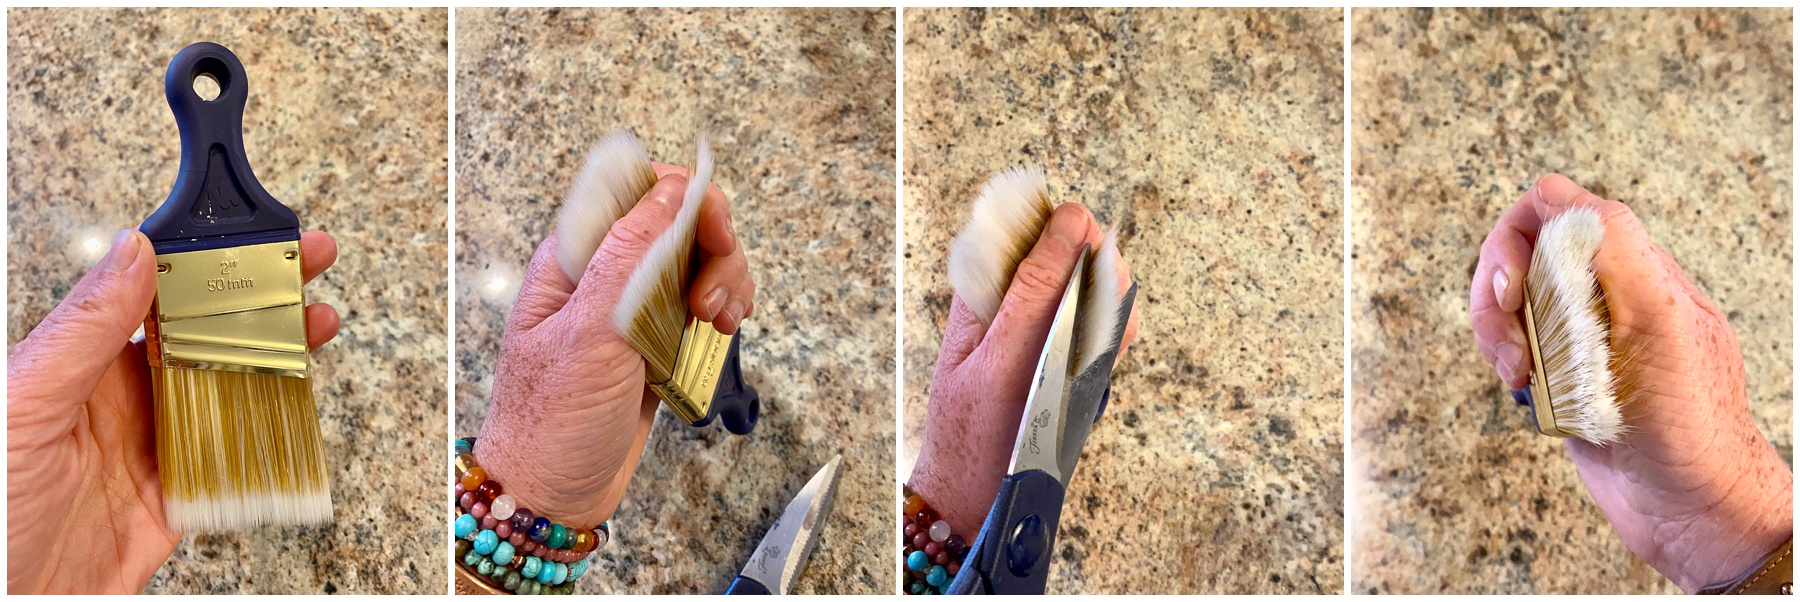
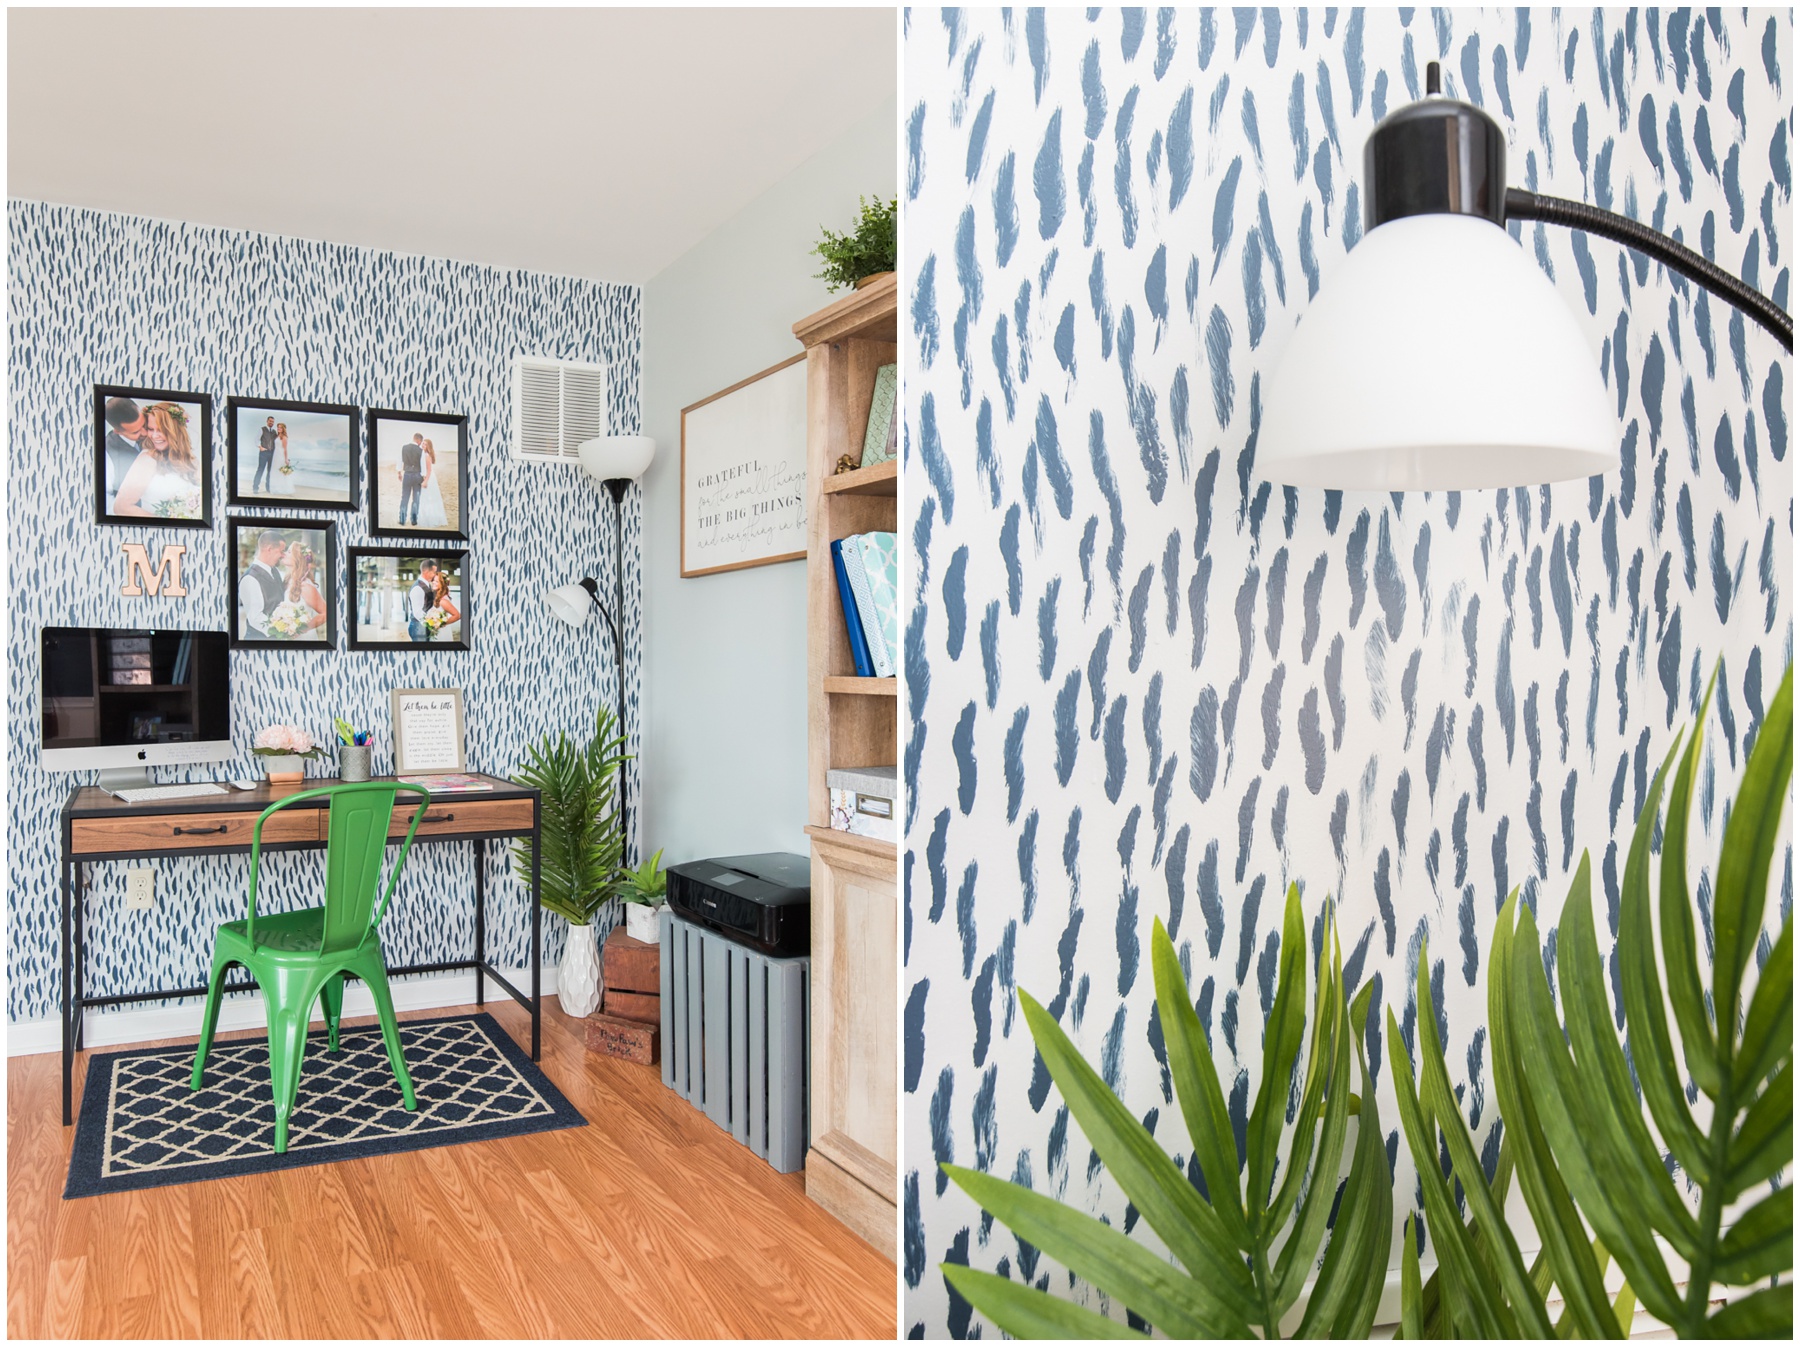
Next I brought in the leftover paint from my kitchen/dining area makeover Benjamin Moore Newburyport Blue and a 2″ angled brush.
I then took the brush and split it with my thumb to cut some of the width thickness off. I’ve attached a photo below to demonstrate the technique. I just eyeballed what I thought about half way was and cut the bristles. When I looked at the brush tip straight on like in the last image I noticed the bristles had a little wave to them because I didn’t cut straight. That is COMPLETELY fine!! It ended up giving my strokes/stamps more of a feathered look and I loved it!
On to painting! I know this is labeled as a brush stroke wall but honestly my method was more of a stamping motion. So with that said there’s actually two ways to complete the wall and I suggest using a piece of paper first to see if you like the stroke motion or the stamp pattern better.
I worked in 15″x15″ sections (just eyeballed the size because it doesn’t really matter). I would dip the brush, press off any excess on the rim of the paint can as I pulled the brush out and stamp, stamp, stamp, stamp all over the 15″ section making sure the stamps weren’t close to each other. I did that because…
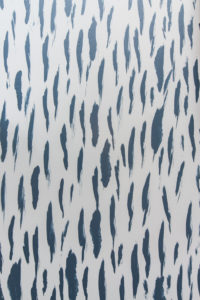 HERE’S THE THING!!!! And this is so important to decide before you start!!! My wall has 3 types of stamps: 1) freshly loaded brush, 2) less paint, and 3) almost empty brush. Each type gave me a different look, 1) bold paint, 2) brush stamp with more texture, and 3) a light feathery look.
When I stamped the brush in that 15″ section I made sure the stamps weren’t close to each other so that I had room to add in the different looks of the stamp that way the pattern blended well on the whole wall. You can see in the image the difference between the stamps and how they are kept separate.
This would be another thing to practice on paper before starting to make sure you like what your cut brush looks like loaded with paint versus almost out of paint. It may be that you want a wall with only the 3rd look and have to empty your brush on a paper towel before stamping your wall. 🤷♀️
Another piece of advice I have is to watch the angle you are stamping from, especially if you are on a ladder. It will look better if you reposition the ladder or stool versus leaning over or stretching up and the brush change the angle it is hitting the wall.
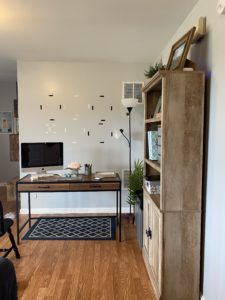
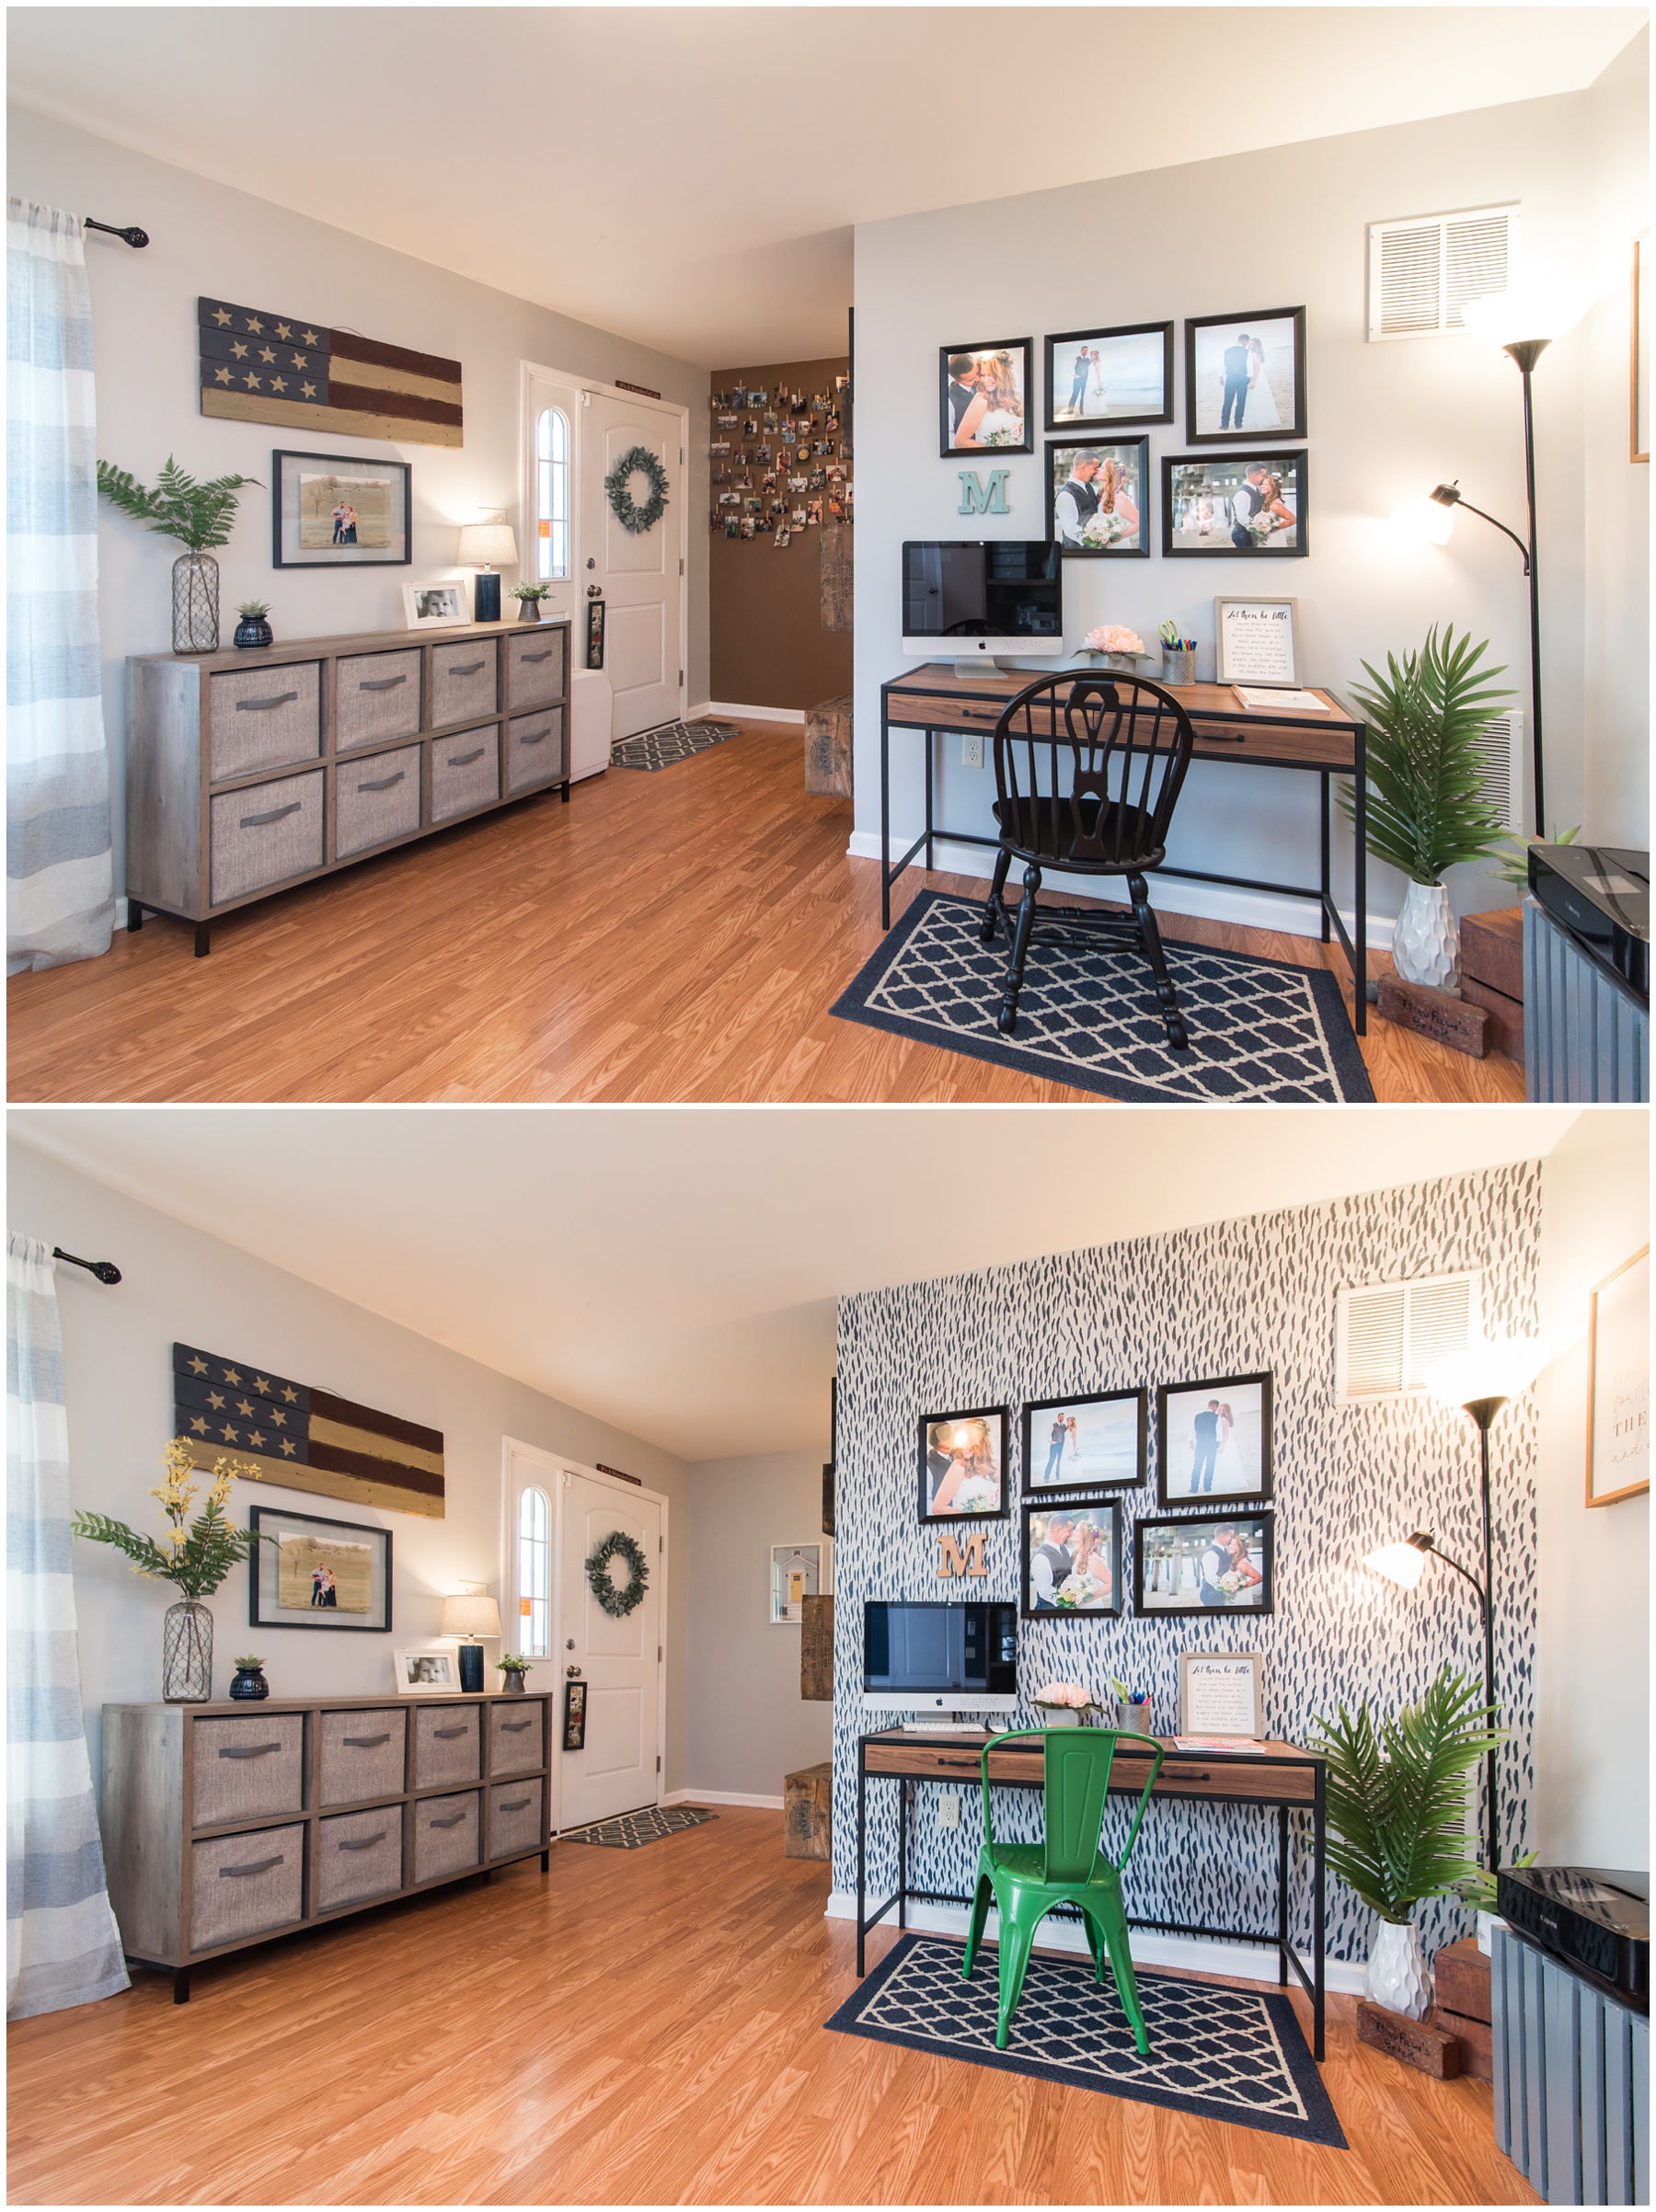
About an hour later, I had completed my wall!
Also, what a different painting over that cowboy brown accent wall and taking those images off the wall made!! 😂
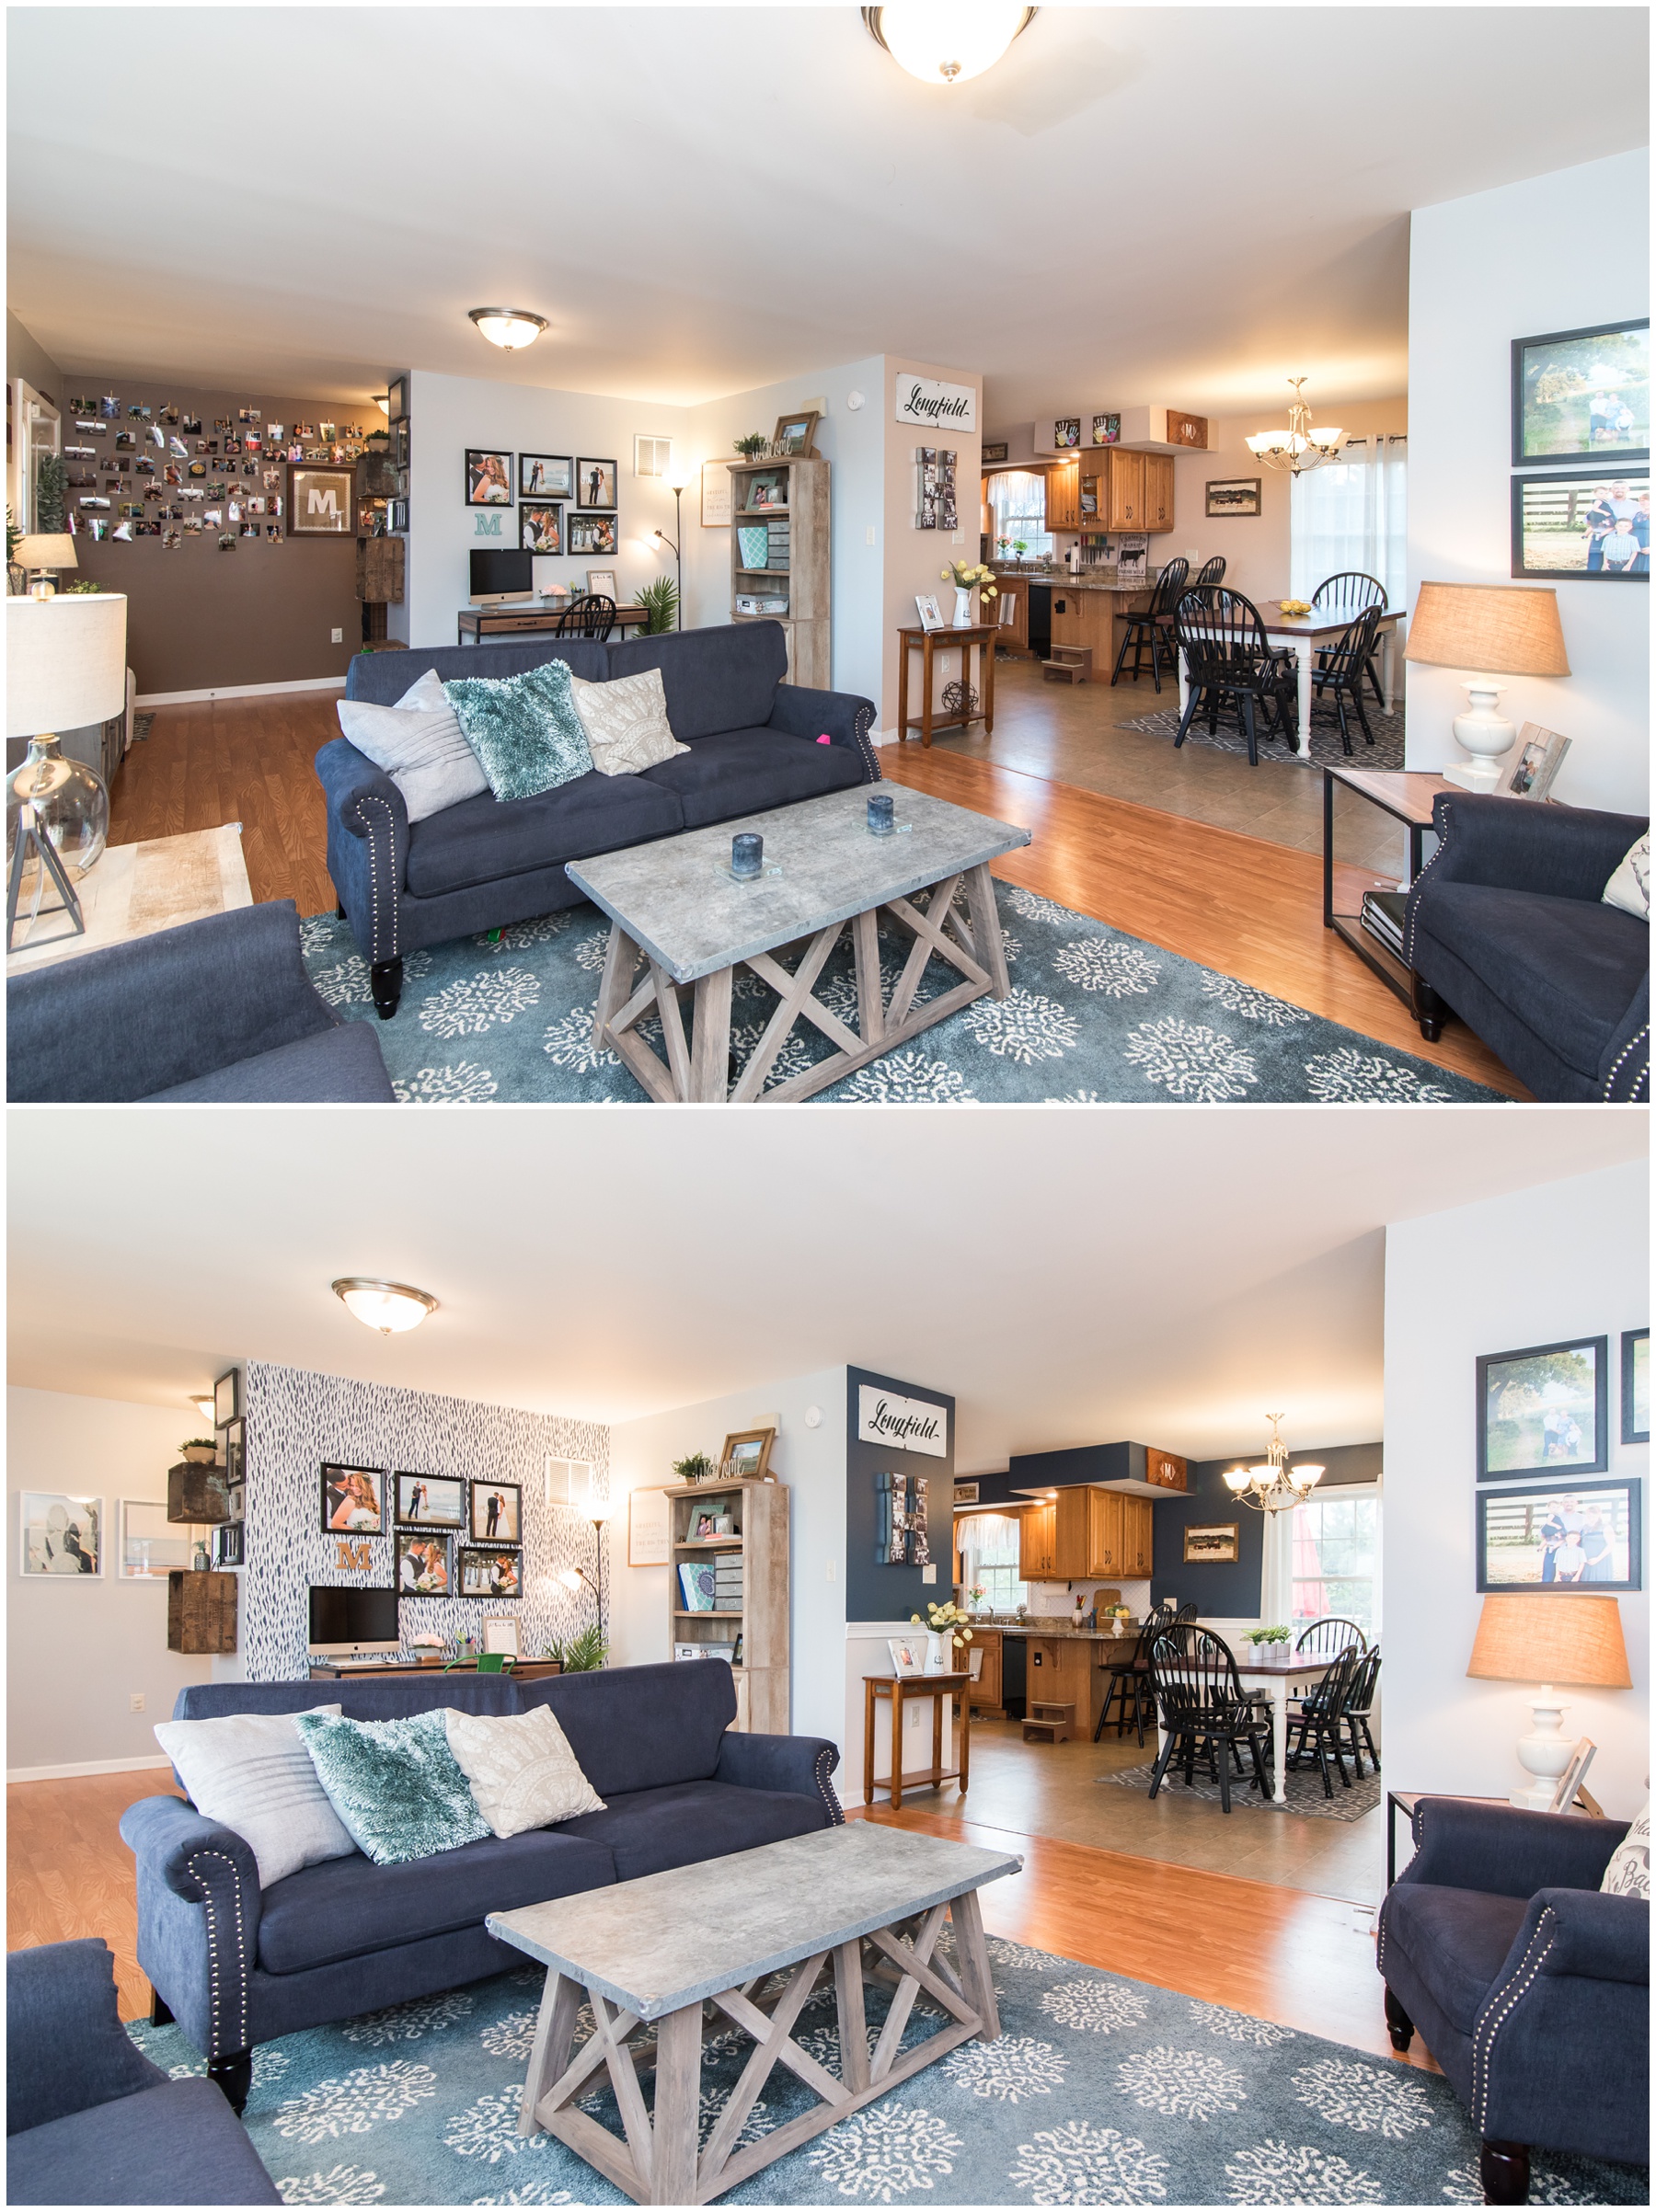
A little peek into the before and after of the kitchen/dining room too! Using blue paint and adding a chair rail made all the difference!
Check out my Ombré Painted Accent Wall

July 15, 2020
Brush Stroke Accent Wall
I adore creating images that are BRIGHT, COLORFUL, JOYFUL, & TIMELESS!
Images that make you feel... because I don't just document your life event,
I capture the and emotion...
With each session you will receive a curated gallery of beautiful portraits you will cherish,
along with candid images that bring a smile to your lips and,
of course, small sweet moments that make your heart happy.
I will guide you every step of the way with gentle prompts to evoke natural embraces,
laughter, and genuine emotion true to your personality.
VIRGINIA WEDDING & PORTRAIT PHOTOGRAPHER
Portrait info
wedding info


